 jennie
 Brewing dark sour beer means guiding roasted malt and lactic acid bacteria through a careful fermentation dance that produces rich, complex beers balancing coffee, chocolate, and tart fruit notes. The process typically takes 6-12 months from grain to glass and requires managing two fermentation stages: a primary ale fermentation followed by extended souring with Lactobacillus or Pediococcus, often alongside Brettanomyces. Unlike conventional sour brewing that relies on pale malts to let acidity shine, dark sours demand precise malt selection to avoid overwhelming roast bitterness that clashes with tartness.
This hybrid style has gained serious traction among Colorado homebrewers since 2024, pushing the boundaries of what our craft beer guide traditionally covered. The challenge? Roasted malts contain compounds that can inhibit souring bacteria, while acidity amplifies astringency from dark grains. Get the balance wrong and you’ll end up with a thin, vinegary mess or a cloying, one-dimensional roast bomb.
Success hinges on three critical decisions: choosing the right dark malts (chocolate malt works better than black patent), maintaining separate equipment to prevent cross-contamination in your clean beer pipeline, and knowing when your mixed culture has reached the sweet spot between funky complexity and drinkable tartness. This guide walks you through each stage with the practical insight Colorado brewers have developed through trial, error, and plenty of patience. The reward is a beer style that surprises skeptics and satisfies your most adventurous friends.
Understanding Dark Sour Beer Styles
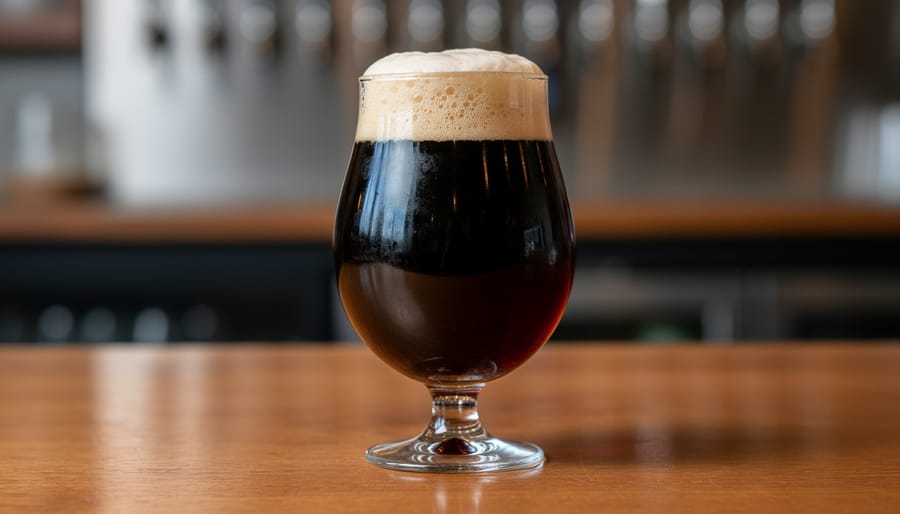
Dark sour beers occupy a fascinating niche where Old World tradition meets New World experimentation. Unlike their lighter counterparts, these beers marry the toasted, chocolatey depths of dark malts with the bright acidity and funky complexity of mixed fermentation. The result? Beers that taste like cherry pie meets espresso, or aged balsamic vinegar drizzled over dark fruit compote.
The Belgian brewing tradition gave us two foundational styles. Flanders Red ales, originating from West Flanders, showcase vibrant cherry and red fruit notes alongside oak-derived tannins and a wine-like acidity. These beers typically spend 18 months to two years aging in oak foudres, developing layers of complexity through Lactobacillus, Pediococcus, and Brettanomyces activity. Oud Bruin, or “old brown,” leans darker and maltier, with pronounced caramel, raisin, and dark fruit character balanced by moderate acidity. Think of it as the gentler cousin, less assertively sour but deeply malty with a subtle tang.
American brewers have taken these templates and run wild with them. American Wild Ales in their dark expressions push boundaries with aggressive hopping, barrel aging in bourbon or wine casks, and fruit additions ranging from blackberries to plums. These beers often feature more pronounced Brettanomyces funk (barnyard, leather, hay) and can achieve higher acidity levels than their Belgian ancestors. Colorado’s craft brewing scene, in particular, has embraced this experimental spirit, with breweries blending traditional techniques with local ingredients and bold flavor combinations.
Then there are the true experiments: dark sours that defy categorization. Some brewers kettle sour a stout base for quick turnaround dark sours. Others age imperial porters with mixed cultures for years, creating something entirely new. You might encounter a dark sour aged on coffee beans, one fermented with wild yeast captured from Colorado’s Front Range, or a blend that tastes like liquid tiramisu with a sour twist.
What unites all dark sours is that delicate balancing act. Too much roast character overwhelms the acidity and creates harsh, astringent flavors. Too little, and you’ve just made a regular sour with some color. When dialed in correctly, the roasted malt provides backbone and complexity while the acidity cuts through richness, creating a beer that’s both contemplative and refreshing.
Essential Equipment and Ingredients
Grain Bill Considerations for Dark Sours
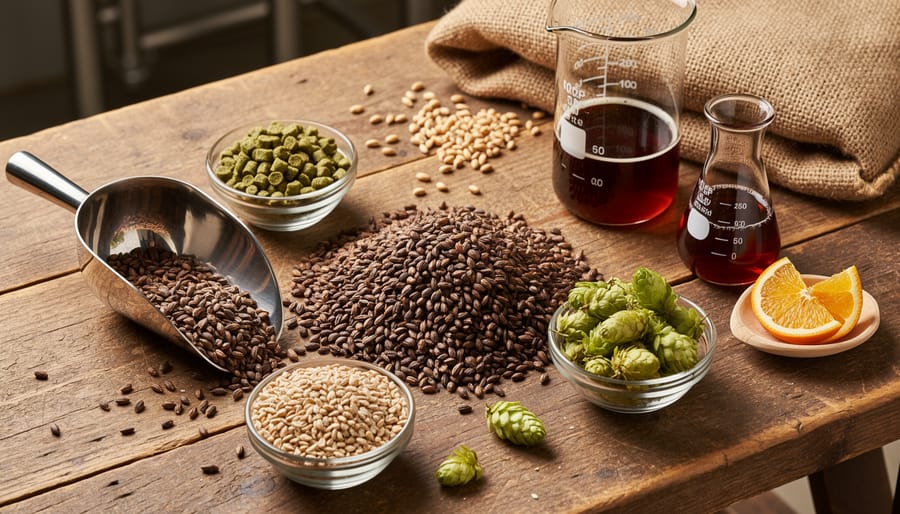
Building a grain bill for dark sours demands a lighter touch with roasted malts than you’d use in a stout or porter. The acidity amplifies perceived bitterness and astringency from dark grains, so what tastes balanced in a clean beer can turn harsh and metallic in a sour.
Start with a solid base of Pilsner or pale ale malt, typically 70-85% of your grain bill, to provide fermentable sugars without competing flavors. For the dark character, limit specialty malts to 10-20% of the total grist. Chocolate malt (300-400°L) contributes coffee and cocoa notes without excessive roast bite, while Carafa Special malils deliver color and subtle roasted flavor with minimal astringency thanks to their dehusked processing. If you’re after deeper roast intensity, add a touch of roasted barley, but keep it under 3% to avoid that acrid, burnt edge that clashes with lactic acid.
Crystal malts in the 60-80°L range, used sparingly at 5-10%, add body and a hint of caramel sweetness that can soften the interplay between roast and acid. Munich malt works similarly, boosting malt backbone without the heaviness.
The key is restraint. Brew a 5% roasted barley beer first, taste it after souring, then adjust. Many Colorado brewers start conservative, around 8-12% total dark malts, and increase in subsequent batches once they understand how their particular microbe blend interacts with roast character. You can always add more darkness; you can’t subtract it from the fermenter.
Selecting Your Microbes
The microbial blend you pitch determines whether your dark sour finishes bright and citric or earthy and funky. For most homebrewers, commercial cultures offer reliable, predictable results without the gamble of wild capture.
Lactobacillus drives clean sourness. L. brevis and L. plantarum drop pH quickly, producing lactic acid with minimal off-flavors. If you want pronounced tartness that cuts through roasted malt sweetness, prioritize Lacto-forward cultures. Wyeast 5335 (Lactobacillus) and White Labs WLP677 (Lactobacillus Blend) are workhorses for homebrewers.
Brettanomyces adds complexity: funky, earthy, fruity esters that develop over months. Brett bruxellensis leans barnyard and spicy, while B. claussenii skews more pineapple and tropical. For dark sours, Brett balances roast bitterness with bright aromatics. Omega Yeast’s OYL-210 (Brettanomyces Trois) brings mango and stone fruit character that pairs beautifully with chocolate malt.
Pediococcus contributes softer, rounder acidity and builds body through exopolysaccharides (the ropy texture you’ll see mid-fermentation). It’s optional but adds depth to traditional Flanders-style dark sours.
Mixed cultures simplify the process, Wyeast 3763 (Roeselare Ale Blend) and White Labs WLP655 (Belgian Sour Mix) combine Sacch, Lacto, Brett, and Pedio in one pitch. For more control, sequential pitching lets you ferment with clean ale yeast first (dropping gravity to 1.020-1.010), then add bacteria and Brett. This approach prevents excessive acetic acid and gives you a cleaner roast backbone before the funk develops.
Safety and Sanitation Protocols
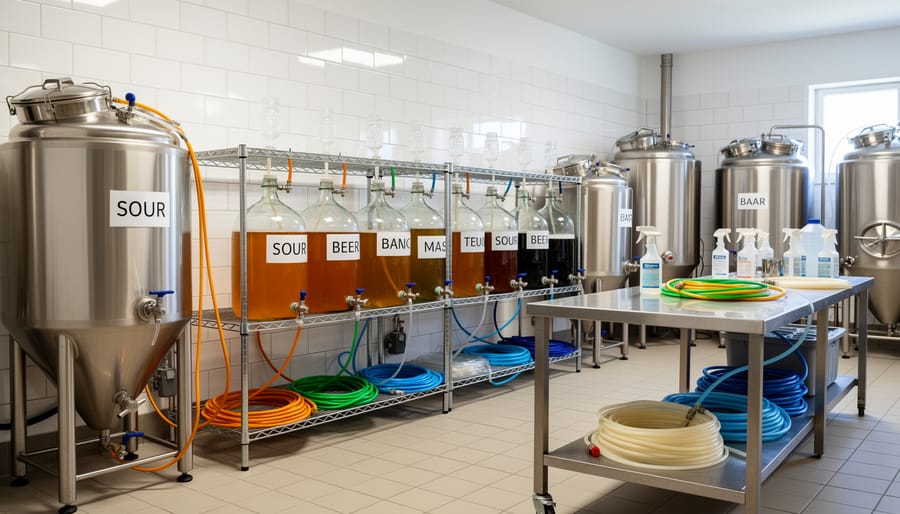
Brewing dark sour beer safely hinges on one core principle: keep your sour equipment separate from your clean beer gear. Bacteria and wild yeast used in sour production won’t harm you, but they will permanently colonize porous surfaces and ruin every subsequent clean batch you try to make. The organisms you’re cultivating, Lactobacillus, Pediococcus, and Brettanomyces, are the same microbes found in yogurt, cheese, and countless fermented foods, so there’s zero health risk when handled properly.
For long-term fermentation vessels, glass carboys or stainless steel work best because they don’t harbor microbes the way plastic does. If you’re aging your dark sour for six months or a year, inspect airlocks monthly and top them off with fresh sanitizer or vodka, evaporation will leave your beer exposed to unwanted contamination. Keep fermenters in a stable environment away from wild temperature swings, and never share siphons, bottling wands, or kegging equipment between clean and sour batches.
When pitching bacteria cultures, treat them like any yeast: store them cold until brew day, check expiration dates, and pitch at the manufacturer’s recommended rate. Many advanced souring techniques rely on controlled inoculation rather than random contamination, which gives you predictable results and avoids off-flavors. Sanitize your hands and work surfaces as you would for any brew, and trust the process, intentional souring with known cultures is far safer than most people realize, producing beer that’s both delicious and completely safe to drink.
Brewing Your Dark Sour: Step-by-Step Process
Mash and Wort Production
Your dark sour’s foundation starts with a well-executed mash designed to create a highly fermentable wort that bacteria and Brett can work through over time. The goal is to produce plenty of simple sugars while extracting rich malt character without pulling harsh tannins that’ll fight with acidity down the road.
- Heat your strike water to 160-162°F and mash in, targeting a mash temperature of 148-154°F. Lower temps (148-150°F) give you better fermentability and a drier finish, while 152-154°F leaves more body to balance the acidity.
- Hold the mash for 60-75 minutes, checking temperature every 20 minutes and adjusting with direct heat or hot water infusions if needed. Dark sours benefit from complete conversion since the microbes will consume almost everything over time.
- Perform a mashout at 168-170°F for 10 minutes to halt enzyme activity and improve wort flow during lautering.
- Recirculate slowly until your runoff runs clear, then begin collecting wort. Take your time with dark malts, rushing lautering can extract astringent tannins that’ll sharpen unpleasantly once acidity develops.
- Sparge gently with 170°F water, keeping the grain bed from compacting. Monitor pH if possible, stopping your sparge if pH climbs above 6.0 or if you taste harshness in the runnings.
Once you’ve collected your target volume, proceed to the boil as normal. A 60-90 minute boil works well, though some brewers go shorter since hop bitterness plays a supporting role in sours. The key takeaway: treat your dark malts gently throughout the process, and you’ll get complexity without the sandpaper edge that ruins many dark sour attempts.
Kettle Souring vs. Mixed Fermentation
When you’re ready to sour your dark beer, you face a fundamental choice: kettle souring or mixed fermentation. Each method produces distinctly different beers, and understanding the trade-offs helps you match technique to your vision.
Kettle souring pre-acidifies your wort with Lactobacillus before the boil, then you ferment with clean ale yeast afterward. You’ll have drinkable beer in 3-4 weeks instead of months. The process is straightforward: after your initial mash, cool the wort to 95-115°F, pitch Lactobacillus (often directly from grain or a commercial culture), purge the kettle with CO2, and let it sour for 24-48 hours until you hit your target pH. Then boil, cool, and ferment normally. The result is a clean, bright acidity, think yogurt tang, paired with your roasted malt character. It’s predictable, doesn’t require dedicated equipment, and works beautifully if you want a roasty-tart beer without funk. The downside? You’ll miss the complex layers that wild yeast and bacteria contribute over time.
Mixed fermentation takes the traditional route: pitch ale yeast first, then add Brettanomyces and bacteria cultures (or pitch everything together). This method demands 6-12 months of aging but rewards patience with depth. Brett adds farmyard funk, tropical fruit esters, and drying phenolics that complement chocolate and coffee notes in ways kettle souring can’t replicate. The acidity develops more gradually and integrates seamlessly with darker malt tannins. The catch is the time commitment, risk of over-acidification, and need for dedicated plastic equipment to avoid contaminating your clean beers.
Choose kettle souring when you want faster results and crisp, focused acidity. Choose mixed fermentation when you’re after complexity, funk, and have the patience for a beer that evolves in the glass.
Primary Fermentation and Pitching Strategy
Your pitching strategy sets the foundation for the complex flavors that define a dark sour beer. Most homebrewers choose between two main approaches: sequential pitching or co-pitching all microbes at once.
For sequential pitching, start with a clean ale yeast like US-05 or WLP001 at your standard fermentation temperature. Let this work for three to five days until primary fermentation slows, dropping the gravity by 60 to 70 percent. Then pitch your Lactobacillus and Brettanomyces cultures. This method gives you more predictable attenuation and prevents the bacteria from competing with ale yeast during the crucial first days, ensuring a solid fermentation foundation beneath the sour character.
Co-pitching everything together works well if you want the wild flavors to develop from day one. Pitch your ale yeast, bacteria, and Brett simultaneously, then let the ecosystem sort itself out. The ale yeast still dominates early, but the mixed culture creates a more integrated flavor profile over time. Some brewers find this produces rounder, more cohesive results in dark sours.
Hold fermentation temperatures between 65 and 72°F during the first month. Warmer temps encourage faster bacteria activity but can push phenolic Brett character too hard. You’ll see vigorous activity for the first week, then things calm down. A thin pellicle may form after two to three weeks. That wrinkled film is normal and shows your bacteria are working. Resist the urge to stir or disturb it.
Long-Term Aging and Flavor Development
Once primary fermentation settles down after the first few weeks, your dark sour enters its most crucial and transformative phase. Extended aging allows Brettanomyces and bacteria to develop the complex layers of acidity, funk, and subtle roast integration that define great dark sours. Plan on a minimum of three months, though six to twelve months often yields the best results.
During this period, resist the urge to interfere. Keep your fermenter in a stable environment between 65-72°F, away from direct sunlight. Check on it monthly rather than weekly. You’ll likely see a pellicle form on the surface, that wrinkled, sometimes brain-like film is normal and indicates healthy Brett and bacteria activity. It’s not mold and doesn’t need removal.
Monitor pH and gravity every 4-6 weeks. Draw small samples with a sanitized wine thief, measuring pH with a reliable meter (test strips lack precision for sour beer). You’re aiming for a final pH between 3.2 and 3.6. Gravity should drop slowly but steadily as wild yeast and bacteria consume complex sugars clean ale yeast can’t touch.
If adding fruit or oak, wait until primary fermentation completes and acidity develops, typically after 2-3 months. Add 1-2 pounds of fruit per gallon for noticeable character, or use oak cubes soaked in bourbon or wine (1-2 ounces for five gallons). Fruit will restart fermentation activity, so allow another 4-8 weeks afterward.
Watch for warning signs. A sharp, vinegary nose suggests excessive acetic acid from oxygen exposure, check your airlock hasn’t dried out. Nail polish or solvent aromas indicate acetone production, often from stressed yeast; time usually mellows this, but it may require blending.
The beer’s ready when gravity holds steady for three consecutive weeks, flavors taste balanced rather than one-dimensional, and that roasted backbone harmonizes with, rather than fights against, the acidity.
Tasting, Testing, and Knowing When It’s Ready
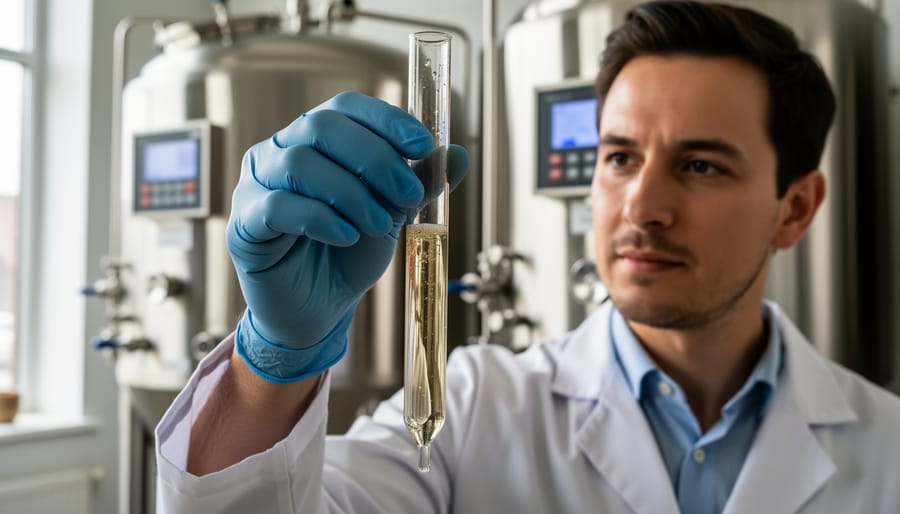
Knowing when your dark sour is ready requires patience and multiple checkpoints. Unlike clean beers, where final gravity signals completion, sours develop over months and stabilize gradually. Your first clue is gravity stability: take gravity readings two weeks apart once you suspect fermentation has slowed. If the gravity remains unchanged for three consecutive readings spaced 10-14 days apart, the microbes have likely consumed all available sugars. Most dark sours finish between 1.002 and 1.010, depending on your grain bill and cultures.
pH tells a complementary story. Target a range of 3.2 to 3.6 for a pleasantly tart but not puckering beer. Measure pH alongside each gravity reading. A stable pH that hasn’t dropped in three weeks, combined with stable gravity, strongly indicates you’re approaching readiness. If pH continues dropping or you’re below 3.2, the beer may become too sour for balance with the roast character. Let it ride a bit longer and taste it, sometimes the perceived acidity mellows as flavors integrate, even if pH stays constant.
Sensory evaluation is where science meets art. Pull a sample and assess the balance between roasted malt sweetness, chocolate or coffee notes, and the acidic backbone. The acidity should complement rather than overwhelm the dark malt character. If roast bitterness clashes with tartness or feels astringent, give it another month, time often smooths rough edges. Check for off-aromas: nail polish remover (acetone) or sharp vinegar suggest problems, while earthy funk and subtle barnyard are normal for Brett-forward beers.
Once you confirm stability and enjoy the flavor, you can package. Add priming sugar calculated for your beer’s volume and target carbonation, keeping in mind residual Brett or bacteria will slowly carbonate over weeks. Bottle conditioning works beautifully for dark sours, producing fine carbonation and allowing continued subtle evolution. If anything feels off or measurements are still shifting, resist the urge to bottle, another month of aging rarely hurts and often transforms a good sour into a great one.
Packaging and Carbonation
Once your dark sour hits target pH and shows stable gravity readings, it’s time to package. This step requires extra care compared to clean beers, since residual bacteria and wild yeast can continue slow fermentation in the bottle.
Bottling vs. Kegging
Kegging offers more control: you can force-carbonate to your exact desired level and avoid the risk of overcarbonation. If you keg, purge with CO2, transfer gently to minimize oxygen pickup, and carbonate to 2.5-3.0 volumes for most dark sour styles.
Bottling is traditional and works beautifully for sours, but demands attention to priming sugar. Use heavy-duty Belgian-style bottles rated for higher pressure, never standard beer bottles. Crown caps work fine, though some brewers prefer corks and cages for long-aged dark sours.
Priming Sugar Calculations
Standard priming calculators assume all fermentable sugars are gone. With sours, some residual sugars may remain even at terminal gravity. To be safe, reduce your priming sugar by 15-20% from the calculator’s recommendation. For 5 gallons targeting 2.6 volumes, start with 3.5 ounces of corn sugar instead of the typical 4.5 ounces. When you brew fruit sours this caution becomes even more critical due to fruit sugars.
Bottle Conditioning and Storage
Condition at 65-70°F for 3-4 weeks, checking carbonation at week three. Sours often take longer than clean beers to fully carbonate. Store finished bottles upright in a cool, dark space. Check a bottle monthly for the first three months to catch any signs of overcarbonation early, before pressure builds dangerously.
Troubleshooting Common Dark Sour Challenges
Even experienced homebrewers hit snags when balancing roasted malt with acidity. If your dark sour tastes overly harsh or astringent, with roast character dominating the tartness, you likely extracted too many tannins during the mash or used excessive quantities of roasted malts. For future batches, limit highly kilned grains like black patent or roasted barley to 2-3% of the grain bill, and consider cold-steeping dark malts separately, then adding the liquid to the kettle. This extracts color and flavor while minimizing astringency that clashes with acid.
Insufficient sourness after months of aging usually means your bacteria didn’t get enough fermentable sugars or the fermentation temperature dropped too low. Verify your mash targeted 148-152°F for a highly fermentable wort, and keep fermentation temps steady at 65-72°F. Pitching additional Lactobacillus or Pediococcus at this stage can help, though you’ll need another 4-8 weeks for noticeable souring. Patience matters here, some strains take six months or longer to reach their full acidic potential.
A thick, wrinkled pellicle on the surface is normal and actually protective, but ropiness (thick, slimy strands when you pull a sample) signals Pediococcus in early stages. Don’t panic, Brettanomyces will eventually break down these exopolysaccharides, typically within 2-3 months, leaving a clean beer behind. Keep the fermenter sealed and let time do the work; racking or disturbing the beer now can introduce oxygen and worsen the texture.
What causes a strong vinegar smell in my dark sour?
Excessive acetic acid from Acetobacter, which thrives on oxygen exposure. Minimize headspace in fermenters and avoid unnecessary openings or transfers during aging.
Why does my dark sour smell like nail polish remover?
Acetone or solvent aromas often come from stressed yeast or bacteria at high temperatures. Lower fermentation temps to 68°F or below and ensure adequate yeast health with proper pitch rates.
Is my fermentation stalled if gravity hasn’t changed in two weeks?
Not necessarily, sour fermentations proceed slowly. Wait 4-6 weeks and retest; if gravity and pH remain stable and flavor is balanced, it’s likely finished rather than stalled.
Can I add fruit to fix a dark sour that isn’t sour enough?
Yes, fruit adds fermentable sugars that bacteria can convert to acid. Follow the fruit sour process for timing and quantities, then allow another 4-8 weeks for renewed souring activity.
Stalled fermentations require careful diagnosis. Check your pH, if it’s already below 3.2, the environment may be too acidic for remaining yeast or bacteria to function. Conversely, if pH sits above 3.8 after three months, consider pitching fresh cultures or blending with a more aggressive sour beer to jumpstart activity. Sometimes the simplest fix is raising the temperature a few degrees to wake up dormant microbes. When in doubt, give it another month before intervening, dark sours reward patience more often than aggressive adjustments.
Colorado Brewer Spotlight: Insights on Dark Sours
We reached out to Sarah Chen, head brewer at Fermentation Station in Boulder, who’s been crafting dark sours for over eight years. Her approach to these challenging beers reflects Colorado’s spirit of experimentation while respecting traditional techniques.
“The biggest mistake I see homebrewers make is going too heavy on roasted malts,” Chen explains. “With dark sours, less is more. I usually keep my roasted barley and chocolate malt under 8% of the total grain bill. The acidity amplifies perceived roast character, so what tastes balanced in a stout can turn harsh and astringent once the pH drops.”
Chen’s go-to base for dark sours starts with 60% pilsner malt for fermentability, 25% Munich for body and malt complexity, then layers in 10% crystal 60L and just 5% Carafa Special II. “The dehusked Carafa gives you that rich color and subtle chocolate without the tannic bite that clashes with acid,” she notes.
Her fermentation strategy favors patience over speed. “I pitch a clean saison yeast first, let it chew through most of the sugars for two weeks, then add my Lactobacillus and Brett blend. That way the Brett has plenty of complex compounds to work with, creating deeper fruit and funk rather than just one-dimensional sourness.”
When asked about the Colorado sour scene’s evolution, Chen points to growing diversity in the category, from traditional Flanders-inspired offerings to experimental non-alcoholic options using similar souring techniques. “We’re seeing brewers push boundaries while maintaining that balance between innovation and drinkability that defines Colorado beer culture.”
Brewing dark sour beer isn’t for the impatient brewer, but that extended timeline is part of the magic. Those months of fermentation and careful monitoring transform simple ingredients into something genuinely complex, a beer that bridges roasted malt depth with tart, funky character in ways that keep you coming back to the glass. The process demands attention to detail, from your initial grain selections through the final gravity check, but the payoff is a beer you won’t find on most store shelves.
Don’t be afraid to experiment once you’ve nailed the fundamentals. Try swapping chocolate malt for Carafa, blend different Brettanomyces strains, or add tart cherries during aging. Every batch teaches you something new about how roast and acid interact, and those lessons make you a better brewer. Connect with other sour beer enthusiasts through homebrew clubs or online forums, the sour brewing community is remarkably generous with knowledge and encouragement.
When your dark sour finally hits that perfect balance, share it. Bring bottles to your homebrew club, pour samples for friends who appreciate taste-matched beer and celebrate what you’ve created. Your next batch is already calling.