 jennie
 Brewing fruit sour beer at home means pitching Lactobacillus or Pediococcus alongside Saccharomyces yeast, letting the mixture ferment for six to twelve months, then adding fruit puree during secondary fermentation to balance tart acidity with bright, natural sweetness. The process requires patience, temperature control between 65-75°F during souring, and careful sanitation to prevent unwanted bacteria from taking over your batch. You’ll spend about three hours on brew day, another hour adding fruit later, and the rest is waiting while biology does the work.
The reward for that patience is a glass of something truly special. Fruit sours capture the best of Colorado’s craft beer scene: they’re creative, they showcase local ingredients like Palisade peaches or Montmorency cherries, and they taste nothing like the mass-market lagers most people grew up drinking. If you’ve ever sipped a tart raspberry Berliner Weisse at a Denver taproom and thought “I could make this,” you absolutely can. The techniques aren’t complicated, but they do require attention to detail and a willingness to let your fermenters sit undisturbed for months while wild yeast and bacteria build complex layers of flavor.
This guide walks you through every stage of the process, from selecting your base beer style and souring method to choosing the right fruit additions and knowing when your beer is ready to bottle. We’ll cover the essential equipment you need (most of it you probably already own), the safety steps that protect both your beer and your other batches from cross-contamination, and the troubleshooting tips that separate a balanced, drinkable sour from a puckering mess. Whether you’re looking for fruit sour recommendations to study before you brew or ready to dive into your first batch, you’ll find everything you need right here.
What Makes Fruit Sour Beer Different
Fruit sour beers occupy a fascinating intersection where acidity meets natural sweetness, creating a dynamic tension that transforms both elements. Unlike standard sour ales where tartness dominates the palate, fruit additions introduce sugars, aromatics, and tannins that fundamentally alter the beer’s trajectory. The fruit doesn’t just flavor the beer, it feeds the microorganisms, shifts pH curves, and creates layers of complexity impossible to achieve in either a straight sour or a fruit ale alone.
The science centers on how wild yeast and bacteria metabolize fruit sugars differently than they handle typical grain-derived fermentables. When you add fruit to an already-soured beer, the simple sugars in berries, stone fruits, or tropical varieties provide a fresh food source for Lactobacillus and Brettanomyces strains. This triggers a secondary fermentation phase that can drop gravity further, increase alcohol slightly, and most critically, generate new volatile compounds. Brett in particular excels at transforming fruit aromatics into complex esters and phenols, think fresh raspberries evolving into a jammy, funky profile with hints of barnyard or leather underneath the bright acidity.
The resulting flavor spectrum runs from delicate to bold depending on fruit selection and timing. Subtle expressions like a Berliner Weisse with a touch of apricot lean light and crushable, offering just enough fruit to soften the lactic bite. On the opposite end, aggressively fruited sours with pounds of cherries or blackberries per gallon approach the jammy, almost smoothie-like territory where fruit nearly overwhelms the base beer. Most homebrewers find their sweet spot somewhere in the middle, enough fruit presence to define the beer’s character, balanced by clean acidity that keeps it refreshing rather than cloying. The interplay between these elements explains why fruit sours have become the gateway style for drinkers intimidated by straight Lambics or unfruited wild ales.
Essential Equipment and Ingredients for Fruit Sour Brewing
Choosing the Right Fruit
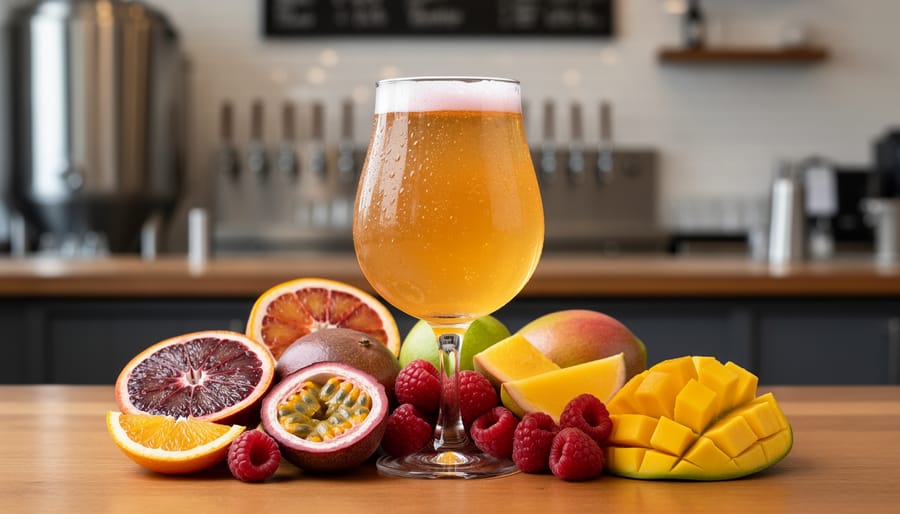
The fruit you choose fundamentally shapes your sour beer’s final character. Fresh fruit delivers vibrant, true-to-variety flavors but demands careful sanitization, rinse well, freeze for 24 hours to break down cell walls, then thaw before adding. Frozen fruit works just as effectively and often costs less; freezing already ruptured the cells, making sugars more accessible to your yeast and bacteria. Fruit purees and aseptic preparations eliminate sanitation worries entirely and provide consistent results batch after batch, though they sometimes lack the aromatic punch of whole fruit.
In Colorado, timing your brew around local harvests rewards you with peak-flavor ingredients. Palisade peaches shine in late summer, while Olathe sweet corn (yes, in a sour) arrives in early fall. Raspberries and cherries hit farmers markets June through August. Off-season, quality frozen fruit maintains excellent flavor integrity.
Start conservative with ratios: one to two pounds of fruit per gallon produces noticeable character without overwhelming your base beer. Stone fruits like apricots and plums pair beautifully with farmhouse ale bases, while berries complement Berliner Weisse foundations. Tropical fruits, mango, passionfruit, guava, deliver bold, jammy notes but require two to three pounds per gallon. Tart fruits like cranberries or sour cherries intensify acidity, so reduce quantities or blend with sweeter varieties. Experimentation reveals your preferences, but these guidelines prevent costly missteps while you’re learning to balance sour beer fundamentals with fruit expression.
Selecting Yeast and Bacteria Cultures
The microbes you choose shape your fruit sour’s character just as much as the fruit itself. Lactic acid souring microbes like Lactobacillus create clean, bright tartness quickly, often within days, making them ideal for kettle sours or fast-turnaround fruit beers. Pediococcus works slower, producing deeper acidity over weeks or months, though it can contribute ropy textures if not managed carefully. Brettanomyces, the wild yeast beloved in Belgian lambics, adds funky, earthy complexity and slowly transforms fruit sugars into nuanced flavors over extended aging periods. Traditional Saccharomyces strains handle the initial fermentation, converting wort sugars to alcohol before bacteria take over.
For beginners brewing fruit sours, a single-strain Lactobacillus approach offers control and predictability. Pitch it during a kettle sour, hit your target pH in 24 to 48 hours, then boil and finish with clean ale yeast. This method keeps your equipment safe from cross-contamination and delivers reliable tartness under your fruit additions.
Mixed-culture fermentations create more complexity but demand patience and separate gear. Combining Saccharomyces with Brett and Lacto or Pediococcus yields layered, evolving beers that reward months of aging. Colorado’s moderate climate works well for long fermentations if you have temperature-stable storage. Start simple with single strains, nail your process, then graduate to blends when you’re ready to invest time and dedicated equipment in wild cultures that’ll live in your gear forever.
Safety and Sanitation Considerations
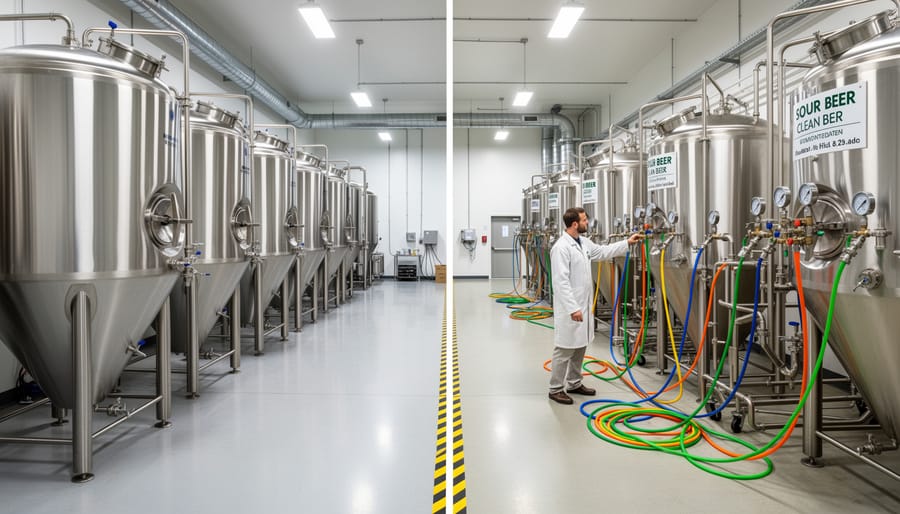
Brewing fruit sours means welcoming wild yeast and bacteria into your process, organisms you normally try to keep out of beer. That shift demands a different sanitation mindset. Standard cleaning removes debris and most microbes, but wild cultures like Brettanomyces, Lactobacillus, and Pediococcus can lurk in scratches, gasket grooves, and plastic pores long after you think everything’s clean. If those hitchhike into your next clean batch, your IPA or lager, you’ll end up with unintended sourness and funky off-flavors that ruin the beer.
Many Colorado homebrewers maintain a “clean side” and a “sour side” in their setup. You don’t need to double every piece of gear, but fermentation vessels, transfer equipment, and anything with gaskets or hard-to-reach crevices should stay sour-only once exposed. Stainless steel kettles, wort chillers, and rigid items you can disassemble and inspect thoroughly can cross over if you sanitize aggressively, but plastic buckets and tubing are cheaper to replace than a ruined porter.
Fruit adds another contamination vector. Fresh fruit carries wild yeast, mold spores, and bacteria on its skin. Freezing kills some microbes but not all; many brewers pasteurize fruit by heating it to 160-165°F for ten minutes, then cooling before adding it to the fermenter. Fruit purees from reputable suppliers are typically aseptic, which simplifies things, though you’ll pay a premium.
Watch your pH, too. Once your beer drops below 4.0, harmful pathogens like Clostridium botulinum can’t survive, the acidity itself becomes a safety barrier. Monitor pH throughout fermentation; if it stalls above 4.2 and stays there, assess your souring culture’s health and consider pitching more Lactobacillus to drive it lower before packaging.
Step-by-Step Fruit Sour Beer Brewing Process
Brewing the Base Beer
The base beer for a fruit sour needs to be deliberately simple, almost bland on its own. You’re building a blank canvas that won’t compete with the fruit and acidity that come later.
Start with a straightforward single-infusion mash at 150-152°F for 60 minutes. This temperature range gives you a mix of fermentable and unfermentable sugars, creating body without the sweetness that would clash with tartness. A grain bill of 60-70% Pilsner malt with 30-40% wheat malt works well, the wheat adds haze and a soft mouthfeel that pairs beautifully with fruit character. Keep it light in color; think straw to pale gold.
Hops barely register in this style. Add just 10-15 IBUs of a clean, low-alpha hop like Hallertau or Saaz at the start of the boil for preservation, nothing more. Skip late additions entirely, you don’t want hop aromatics fighting with fruit esters or floral notes masking berry character.
Boil for 60-90 minutes to drive off DMS from the Pilsner malt, then chill to around 95°F if you’re pitching Lactobacillus first, or standard ale temperatures (65-68°F) for a mixed culture. The wort might taste almost boring at this stage, which means you’ve nailed it. This restrained base lets fruit and sourness become the stars.
Introducing Souring Cultures
Pitch your souring cultures immediately after knockout, while the wort is still warm, around 90-100°F for Lactobacillus, cooler for Brettanomyces and Pediococcus blends. If you’re kettle souring with Lacto alone, hold at that temperature range for 24-48 hours to drop the pH quickly before boiling and pitching clean ale yeast. For a mixed-culture approach, let your primary Saccharomyces fermentation finish first, then introduce Brett and bacteria once the beer has cooled to 65-75°F. This staged method gives you more control and prevents the wild strains from battling the clean yeast for resources.
Temperature management is critical during the souring phase. Lactobacillus thrives in warmth but stalls below 65°F, while Brett works slowly and steadily across a wider range. Keep your fermenter in a stable spot, basements work well in Colorado, and avoid swings that stress the cultures. Monitor pH weekly with a calibrated meter, aiming for 3.2-3.5 for a balanced tartness. The descent is gradual, often taking weeks or even months depending on your culture blend and base beer strength. Patience pays off. Once the pH plateaus for two consecutive readings and gravity stabilizes, you’re ready to add fruit and let the renewed fermentation refine the character further. For more on mastering sour beer brewing techniques, including advanced culture management, explore our broader guide. If you’re weighing kettle sour versus barrel-aged methods, that comparison can help you choose the right path. And for those working with grain, understanding how to adjust mash pH ensures your base beer sets up the souring cultures for success.
Adding Fruit at the Right Time
Timing your fruit addition dramatically affects the final flavor profile and integration. Most brewers choose secondary fermentation, adding fruit after the initial souring phase has established acidity, because it preserves bright, fresh fruit character that primary additions often sacrifice to vigorous fermentation. Primary additions, while creating more integrated, subtle fruit notes, risk losing volatile aromatics to CO2 scrubbing during active fermentation.
Before adding fruit, prepare it properly. Freeze fresh fruit for at least 48 hours to break down cell walls and improve juice extraction; frozen commercial fruit works perfectly here. Thaw completely, then puree or roughly chop depending on your preference for clarity versus body. Sanitization matters: freezing helps, but some brewers pasteurize fruit by heating to 160°F for 15 minutes, though this sacrifices some fresh character.
Plan for one to two pounds of fruit per gallon for noticeable character, though bold fruits like raspberry or cherry work at the lower end while subtler options like peach need the higher ratio. Colorado brewers have excellent access to Palisade peaches and Western Slope cherries, both shine in sour beers.
Expect renewed fermentation within 24 to 48 hours as yeasts and bacteria consume the fruit sugars. This secondary fermentation typically runs two to four weeks. Use an airlock and monitor activity; when bubbling stops and gravity stabilizes for three consecutive days, you’re ready to package. The extended contact time during this phase extracts color, flavor, and tannins, so taste regularly after the first week to catch your preferred balance before over-extraction turns fruity brightness into jammy heaviness.
Testing, Tasting, and Knowing When It’s Ready
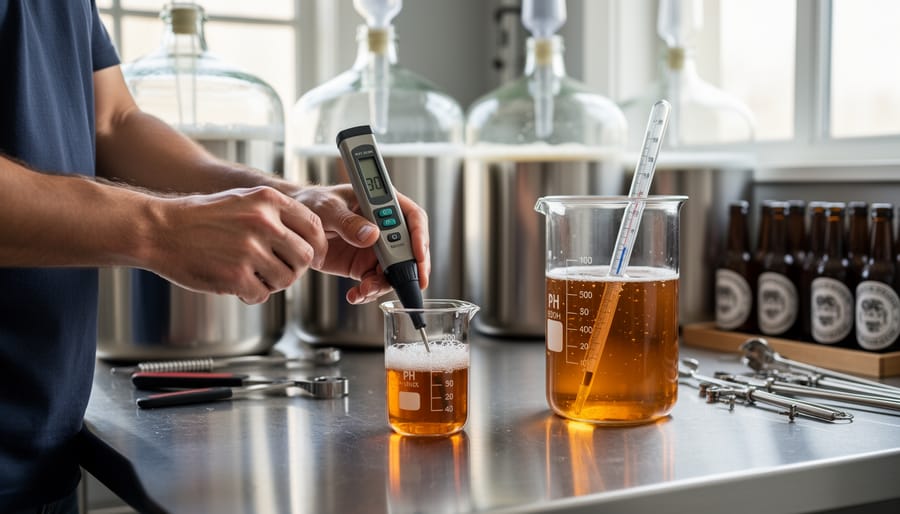
Knowing when your fruit sour has crossed the finish line requires patience and a combination of objective measurements and sensory evaluation. Unlike clean beers that finish in weeks, fruit sours can take months to reach their peak, and rushing to bottle can lead to over-carbonated bombs or underdeveloped flavors.
Start with pH testing using either strips or a digital meter, your fruit sour should typically land between 3.2 and 3.6 pH, depending on your target tartness. Take readings weekly once you’re past the three-month mark, and look for stability: when pH hasn’t budged in two consecutive weeks, your souring cultures have likely done their work. Gravity readings tell a complementary story. Check with a hydrometer or refractometer, expecting final gravity around 1.002 to 1.008 for most fruit sours. The fruit addition will restart fermentation, so you’re looking for stable readings over at least ten days before considering packaging.
Sensory evaluation matters just as much as the numbers. Sample regularly from your fermenter, noting how tartness, fruit character, and funk evolve. The fruit should taste integrated rather than raw or boozy, the acidity should make your mouth water without puckering, and any funky Brett notes should complement rather than overpower the fruit. Colorado homebrewers often find that local peaches or cherries need four to six months post-fruit addition to fully meld with the base beer.
Before you package, confirm these readiness indicators:
- pH stable for two consecutive weeks in your target range
- Gravity readings unchanged over ten days
- Tartness level matches your vision without harsh edges
- Fruit flavors fully integrated, not overpowering or faded
- No diacetyl, acetaldehyde, or other off-flavors present
If something feels off, give it another month. Fruit sours reward patience, and an extra few weeks can transform a good beer into something exceptional. When everything aligns, move confidently to packaging with priming sugar calculated for moderate carbonation, typically around 2.5 to 3.0 volumes of CO2 for the style.
Common Troubleshooting and Next Steps

If your fruit sour turned out puckeringly acidic, don’t dump it, blend it with a clean base beer at bottling to dial back the intensity, or use it as a component in mixed fermentation experiments. Conversely, a batch lacking tartness might just need more time; pH can continue dropping for months, especially if you pitched Pediococcus alongside Lacto. You can also introduce additional souring cultures during secondary, though be patient, results won’t appear overnight.
Fruit character fading is one of the most frustrating outcomes, usually caused by adding fruit too early or using excessive heat during pasteurization. To recapture those vibrant notes, add a small amount of fresh fruit or high-quality puree just before packaging, giving it three to five days to integrate without triggering a full refermentation. For pellicle concerns, remember that ropy, textured surface growth is normal with Brettanomyces and Pediococcus, it’s protecting your beer from oxygen, not ruining it. Only toss a batch if you detect vinegar sharpness, which signals Acetobacter contamination from poor airlock management.
Why is my sour too acidic?
Overactive Lactobacillus or excessively long souring times can push pH below 3.0, creating harsh tartness. Blend with a neutral base beer to balance acidity, or use the batch as a blending component in future brews.
Why isn’t it sour enough?
Souring takes time, sometimes six months or longer for Pediococcus to fully develop. Check your pH; if it’s still above 3.4, give it more time or pitch additional Lactobacillus.
Can I add more fruit later?
Absolutely. Adding fruit at packaging can restore faded character, though allow three to five days for flavors to integrate and watch for renewed fermentation activity.
Is that pellicle normal?
Yes, a wrinkled or ropy surface layer is typical with Brettanomyces and Pediococcus. Only worry if you smell vinegar, which indicates unwanted Acetobacter growth.
Once you’ve nailed your first fruit sour, push your skills further by experimenting with mixed-culture fermentations using local Colorado stone fruits like Palisade peaches or Olathe sweet corn for unconventional twists. Try wood aging in neutral oak to add complexity, or explore taste matching principles borrowed from beer and wine service to refine your fruit selections and acidity balance. For those interested in lower-ABV options, consider developing N/A sour alternatives using similar souring techniques on session-strength bases. The real growth happens when you start keeping detailed tasting notes, adjusting fruit ratios by small increments, and learning which wild cultures express best with specific fruits in your fermentation environment.
Brewing fruit sour beer rewards patience and curiosity with flavors you won’t find anywhere else. You’ve learned the entire process, from selecting your fruit and cultures to managing fermentation, testing for readiness, and troubleshooting setbacks. Now the real adventure begins: experimenting with Colorado’s seasonal bounty. Try Palisade peaches in summer, tart cherries from the Western Slope, or foraged wild plums for a truly local expression. Each fruit brings new challenges and possibilities, pushing your skills further.
Don’t stop here. Explore barrel aging, blending multiple batches for complexity, or even non-alcoholic options using similar souring techniques. Every brew teaches you something, about acidity, fruit integration, wild yeast behavior, and your own palate. The Colorado homebrewing community thrives on sharing these discoveries, so bring your fruit sours to local homebrew clubs, swap bottles with fellow brewers, and keep refining your recipes. You’re now part of a brewing tradition that values creativity, experimentation, and the delicious tension between control and letting nature work its magic. Your next great fruit sour is waiting.